In this lesson, we focused on lyrics in music. We split into groups and were
given a series of lyric writing tasks that required us to think in some detail
about what we were writing, with focus being on getting words down. I
personally found this quite interesting, as the majority of music that I listen
to does not have lyrics in it (jazz/lofi). I have also not previously written a
song with lyrics, as I do not sing and it also did not interest me, although
the tasks that we did made it seem easier than I would have thought.
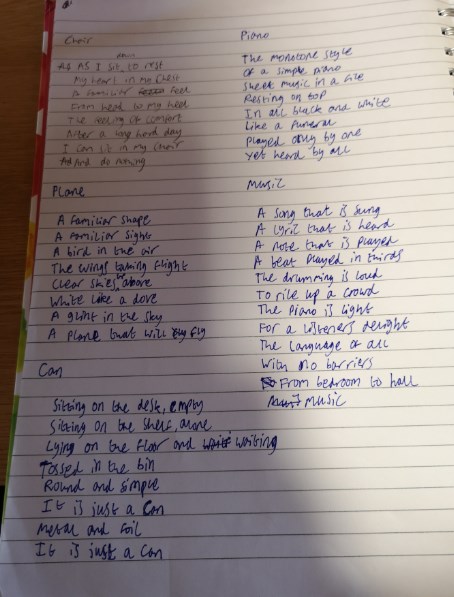
One of the tasks in the lesson involved us doing group lyric writing, which
meant that someone in our group picked a word that we then each wrote lyrics
about before sharing them with the rest of the group. I found this to be a good
method for lyric writing that could be useful in the future in a band/group
situation. Another task involved us taking 5 minutes individually to write a
series of lyrics about random objects. We were encouraged to think in some
detail about this, including any story/memories that could potentially be
behind the object. This was also a set task, which involved us having to do
this 5 times over the course of the week. The lyrics that I wrote for each
object are below:
In this lesson, we discussed how a performer can connect with their
audience. One example of this is through the stage presence of the performer,
which is essentially what the performer is doing whilst playing their music or
singing their music. This includes their position on stage, how they are moving
and how they are interacting with their audience and the rest of their band if
they are part of a group. I personally think stage presence is very important
as an audience can easily lose interest in a performance if the performer looks
uninterested in the music they are playing. I also know this from personal
experience playing in a band, as we constantly had to remember to have a good
stage presence whilst also ensuring that our parts were all correct.
We also had a rehearsal as a band this week, which mainly focused on finding
an idea that we all liked and that we could expand upon. We were also using a
drum machine in this rehearsal, which we explored a bit but did not make any
major ground with. Overall the rehearsal could have been more productive from a
songwriting perspective, but I also feel that it is important to get used to
being in a rehearsal space as a band.
This lesson was mainly focused on the assessment itself, with the requirements being reiterated to us. We also chose our bands for the performance side of the assessment, and I joined a band with Hadyn B, Hadyn A and Zara. This was beneficial to me because we each had different tastes in music, which meant that whatever genre we picked to play, we would each be able to influence our songwriting differently. We decided to be a synth-pop style band, which I believe is a good choice as I enjoy that genre of music but I have not attempted to write in the genre before. I will also be able to use my own synthesizer in our final performance which is a benefit because I know a lot of the sounds on it and I would be able to pick the best sound suited to any song that we write. We were also able to create a Spotify playlist with some synth-pop style songs that we already knew, which is linked below:
Today, we looked at how our surroundings can influence how we write music. Melodies and structure are obviously important components of any song, but the idea behind a song is equally as important, as it gives you a good place to start writing. For the task itself, we again split off into groups and were tasked with writing a song based on a walk around the university campus. This included paying specific attention to our surroundings and the noises around us as we walked around. Our group decided to start our walk in reception, and then proceed out along a path towards the car park. We then walked towards and around the lake before heading back to reception along a long, straight path.
From our walk around the campus, we decided that our song would take the following form:
The walk from reception towards the car park would start with a simple piano melody of octaves, and would be fairly relaxed block chords on the piano, with the saxophone playing simple short melodies
From the car park around the lake, the song would pick up slightly, with arpeggios on the piano and some slightly more complex melodies on the saxophone
From the end of the lake back to the reception, the song would begin to relax with a bridge section
Reaching reception, the song would repeat the introduction as an outro
We used our surrounding to influence the song itself. For example, the reception area was a fairly quiet area, although there were people walking around, so I decided to play something that was simple but not too relaxed. The walk from reception to the car park led us to play with slightly louder dynamics as we were hearing more sounds outside. The ending of the song was the intro repeated, as we were in the same area that we started in.
Overall I was happy with the song we wrote. However, I feel that it could have been improved if we were to have another instrument or 2 for a functional bass line or for a beat layer.
At the start of today’s lesson, we performed our song infront of the class. Our group decided in the end that we were going to use an actual drum kit instead of a synthesizer, and that I would use a different synthesizer than the one I used previously. We managed to perform our song successfully, and the change of instruments didn’t affect the performance. If we were to do it again, I would have a second rehearsal session prior to the performance in order to ensure that we understood the structure of the song properly, as that was the only part in the performance that we were not entirely sure about.
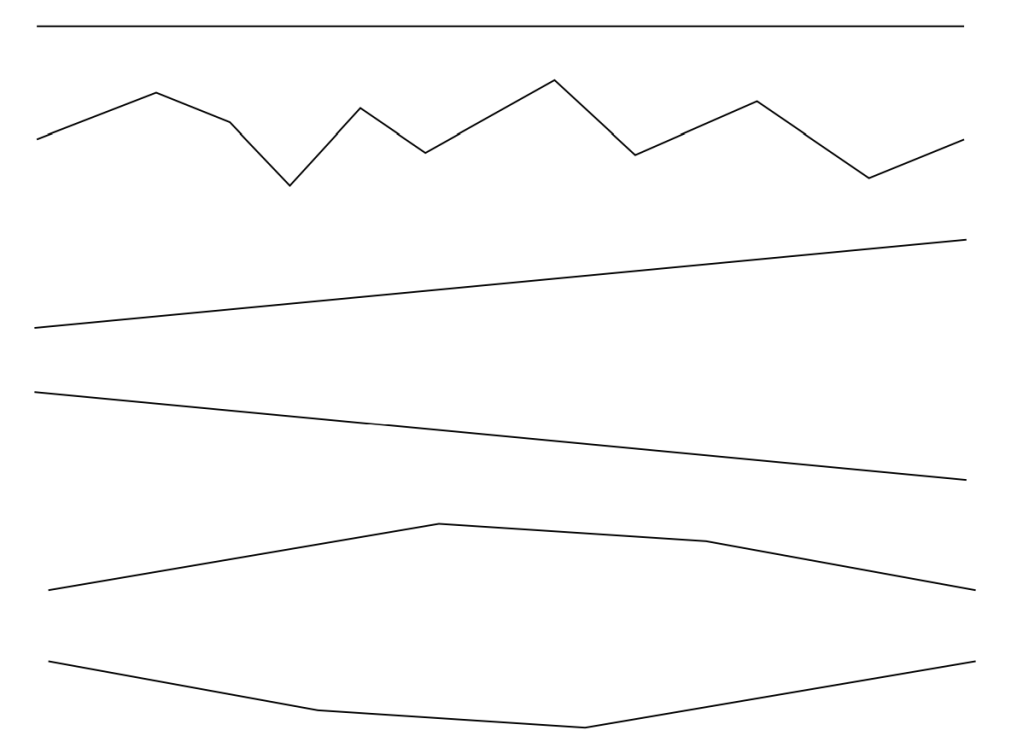
In the lesson itself looked at the principal of melodies. We were shown how melodies can be interpreted through visual images, such as the lines below:
For example, the top line could be a note or chord that is being held, or even a note/chord that is being played repeatedly. The second line is obviously a more varied and random melody, and the next two lines are a constant ascending and descending melody. I personally found this quite interesting, as I had never previously thought about melodies in a visual sense. Through my own experience playing piano, I enjoy playing a lot of jazz songs/standards, either with a backing track or solo which often involves improvisation. Because of this, melodies are something that I consider to be quite important when playing/improvising and I think it could potentially offer a different angle for more to imagine the melodies as visual lines in my head. One of my favourite examples of melodies in improvisation would be from Bill Evans in his improvising over the jazz standard “How Deep Is The Ocean?”, from 0:49 onwards in the performance below:
Our task for the lesson was to write an original melody based on the idea of stable and unstable tones. A stable tone is essentially a note within a key signature that sounds “correct”, and will form part of the root chord of the key that the chord is in. For example, in the key of C major, the stable tones would be 1, 3 and 5, which are the notes C, E and G respectively. These notes make up the C major chord. On the other end, unstable tones are notes within a key signature that may sound “incorrect” or “dissonant” compared to the stable tones. Using the C major scale example, the unstable tones would be 2, 4, 6 and 7, which are the notes D, F, A and B respectively. This pattern does not change in any other major key signature, as the stable tones will always be the 1st, 3rd and 5th notes of the major scale, and the unstable tones will always be the 2nd, 4th, 6th and 7th notes of the major scale.
For the task itself, we were tasked with writing a melody in a major key with certain creative restrictions:
The first phrase must begin on a stable tone and end on an unstable tone
The second phrase must begin on an unstable tone and end on a stable tone that resolves the last note of the first phrase
The third phrase must begin on an unstable tone and end on an unstable tone
The fourth phrase may begin on either a stable or an unstable tone, it must end on a stable tone that resolves the last note of the third phrase
I decided to stick with the key of C major for my melody, and I also decided to keep the melody itself fairly simple with my main focus on the creative restrictions. If I was to repeat this task, I would most likely change the key and also use more interesting rhythms. The melody is linked below (note: it is quite loud):
In this lesson, I learned about the basic musical layers behind a song. These included:
Explicit beat layer
Functional bass layer
Melodic layer
Harmonic filler layer
These layers are the base in which many songs are made. For example, the explicit beat layer could be a drum kit, the functional bass layer could be a bass guitar, the melodic layer could be a singer, and the harmonic filler layer could be a guitar. These 4 instruments would easily be able to make a song or form a band.
Our task for this lesson was to get into groups again and make another song that utilized the 4 layers that we had discussed, which had to contain the following:
A simple, clear groove
A functional bass line
A simple 3 note melody
Harmonic filler
We split into groups and began writing our song. Because we did not have a bass player, I decided to use a synthesizer in order to play a functional bass line. I then noodled around the synthesizer to find a sound I liked and to work out a bass line, which ended up being based around the key of C, so we went with that. The harmonic filler was provided by a guitar, and we used a drum machine in order to work out a simple drum beat for the time being. After the lesson itself, we decided as a group that the drums would be played on another synthesizer instead of the drum machine, as we did not know how to use it properly. Personally I think that this was a good decision because the drums on the synthesizer sounded less static than the drums on the drum machine, which essentially sounded like a metronome but at different pitches. A recording of the song is below:
We were also tasked with creating a written analysis of a song which related to the 4 layers that we were discussing, which is below:
Song: Vulfpeck – 1612
Explicit beat layer
Throughout the song, the beat layer is provided by the drum kit, which consists of a snare drum and bass drum. The bass drum can be heard playing mostly in sync with the bass and electric guitar, which are playing the main riff. The snare drum repeats the same syncopated pattern throughout the song, and the rim of the snare drum is also used instead of a hi hat, which is playing a different and slightly less syncopated pattern to the snare drum. There is also a small tambourine being played every time the rim of the snare drum is hit.
Functional bass layer
Throughout the song, the bass layer is provided by bass guitar, as well as an electric guitar. The bass and the electric guitar can be heard playing the main riff in unison throughout the verse and chorus, making it mostly repetitive with some variations at times. For example, near the end of the song, the bass can be heard playing multiple improvised fills whilst the guitar continues to play the main riff. The guitar and bass also play in unison during the keyboard solo, which is the only part in the song where the guitar and bass play a part is different from the main riff.
Melodic layer
The melodic layer throughout the song is provided by the vocals. The vocals are mostly in the higher vocal range throughout, with falsetto being used frequently, particularly in the chorus. After the keyboard solo, the vocals become less confined to the structure and begin to reflect more of an improvisation. This can be heard through the use of vocal runs as well as variations of the hook in the chorus, “1612” and “six teen twelve”.
Harmonic filler layer
The harmonic filler layer throughout the song is provided by the keyboard. Unlike the other instruments in the song, the keyboard does not specifically play the main riff, making it different in comparison to the electric guitar and bass, which are solely playing the main riff aside from some occasional bass fills. The keyboard part in the verse consists of legato chords, with grace notes and some staccato notes, whereas the keyboard in the chorus solely consists of 2 chords played staccato. The keyboard also has an improvised section in the middle of the song and also drops out briefly in the section before the double chorus at the end of the song.
In this lesson, we looked at the idea of an actual song and how we would define it. Personally I would define a song as a piece of music with lyrics, although I know that other people may have different opinions on this. We also looked at song structure, specifically the AB format. This format usually means a song that follows a verse-chorus-verse-chorus format. We were then tasked to get into groups and to write a short 2-3 minute song in AB form.
In our group rehearsal, we came up with a fairly simple chord progression which had a descending pattern. I helped create this by playing alongside Joe and by suggesting chords that I thought would work with the key and the feel that we had decided to go with, which was pop. We decided that our song would first have a short intro into the A section, and we also decided that the A section would be a typical pop style verse with lyrics. We then wrote the B section and used a few different chords, as well deciding to use “Oooo” sounds instead of lyrics. I thought that this gave the song some much needed variation, as I don’t think that it is that easy to have a lot of variation in a song where you are confined to only a verse and a chorus.
Doing this task made me think of other songs that have a very simple form, yet are very well known. I personally believe that although there is not a lot of structual variation, simple form songs can be very catchy. One such example is One Step Beyond by Madness, which uses the same 3 chords throughout in almost the same pattern.
In this lecture, I was introduced to the course for the first time. This included an explanation of what our end goal would be in order to complete the assessment successfully. This end goal consists of a performance of an “original composition, between 3-5 minutes in length.”. It also includes keeping this blog in order to document each session as well as the module tasks. We were also shown the next assessment after this, although we will not be starting it until we have finished the first assessment.
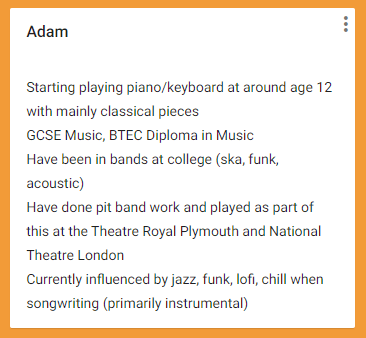
Our main activity in the lecture was a series of icebreaker activities. We split off into groups and each said our name, favourite food and our favourite artist or song at 14. We also used the website Padlet to share our musical influences (and some random life hacks) as well as a practice profile listing our experience with performing and with our respective musical instruments.